Building micro services through Event Driven Architecture part22 : Kubernetes
Building micro services through Event Driven Architecture part22 : Kubernetes
This tutorial is the 22th part of a series : Building microservices through Event Driven Architecture.
Kubernetes, also known as K8s, is an open-source system for automating deployment, scaling, and management of containerized applications.
It groups containers that make up an application into logical units for easy management and discovery. Kubernetes builds upon 15 years of experience of running production workloads at Google, combined with best-of-breed ideas and practices from the community.
To learn more about kubernetes core concept, you can follow this link : https://kubernetes.io/
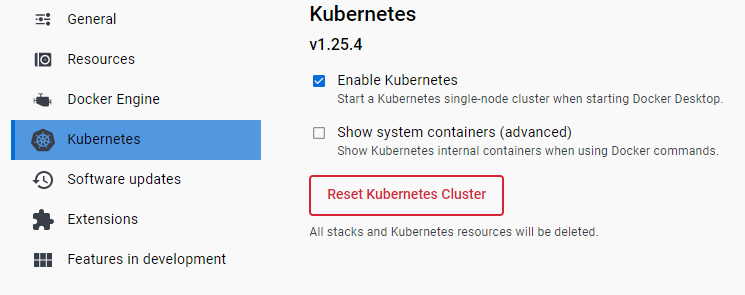
In this tutorial I will use Docker desktop with kubernetes enabled which provide an easy way to run kubernetes on local desktop for testing purposes
Enable Kubernetes
To enable kubernetes, I just need to download and install docker for desktop and activate it
Build docker images
To deploy application in kubernetes, we need to dockerize the application and build docker image.
So, you can run the following command to build the images, locate the docker-compose.yml file under (\LogCorner.EduSync.Speech.Command\src)
# cleanup all images from my local computer, this step  is optional
docker rmi -f $(docker images -a -q)
# cleanup all volumes from my local computer, this step is optional
docker volume rm $(docker volume ls -q)
# Build the images using my docker-compose.yml file
docker-compose build
The build will produce 2 images : logcornerhub/logcorner-edusync-speech-command and logcornerhub/logcorner-edusync-speech-mssql-tools
Build kubernetes configuration files
login to your azure account and set your Azure default Subscription
az login
az account set --name [your subscriptionId ou subscriptionName ]
in ths tutorial, I will use docker-desktop and enable kubernetes.
If you have many kubernetes clusters in your kubeconfig file, please run the following commands to use docker-desktop as your default kubernetes cluster.
kubectl config get-contexts
kubectl config use-context  docker-desktop
kubectl cluster-info
Deploy database configuration files
inside folder \LogCorner.EduSync.Speech.Command\kubernetes\docker-desktop\CommandDatabase you can find the kubernetes configuration files of the database : the deployment configuration file and the service configuration file
db-deployment.yml file :
db-job.yml file
db-pvc.yml file
db-service.yml file
db-secret.yml file
# deploy the configuration files under CommandDatabase to kubernetes
kubectl apply -f ./kubernetes/docker-desktop/CommandDatabase

# get all running pods
kubectl get pods
# get all running services
kubectl get services


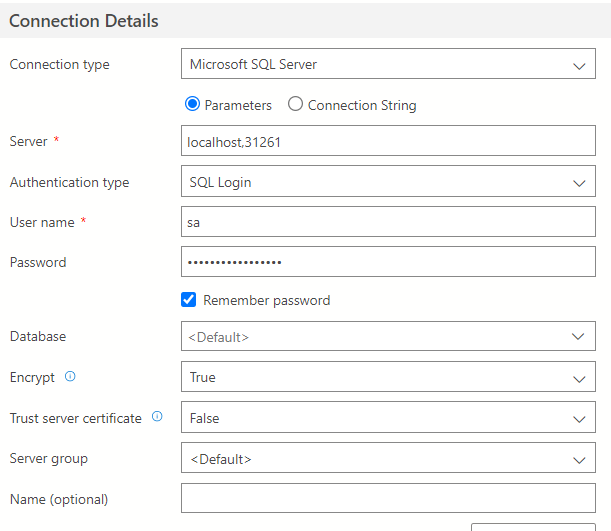
Test database connectivity
You can connect to the database by using servername = localhost,<port_number> , port_number is the nordport. and provide the passwork in db-secret.yml (the password is here for testing, it will be in azure keyvault in upcoming tutorial when deploying to aks)
Deploy api configuration files
inside folder \LogCorner.EduSync.Speech.Command\kubernetes\docker-desktop\CommandApi  you can find the kubernetes configuration files of the command http api : the deployment configuration file and the service configuration file
# deploy configuration files from CommandApi folder
kubectl apply -f ./kubernetes/docker-desktop/CommandApi

# get all pods
kubectl get pods
# get all services
kubectl get services


Test api deployment
Open a browser, localhost:<port_number>/swagger/index.html , port_number is the nodeport of the api service
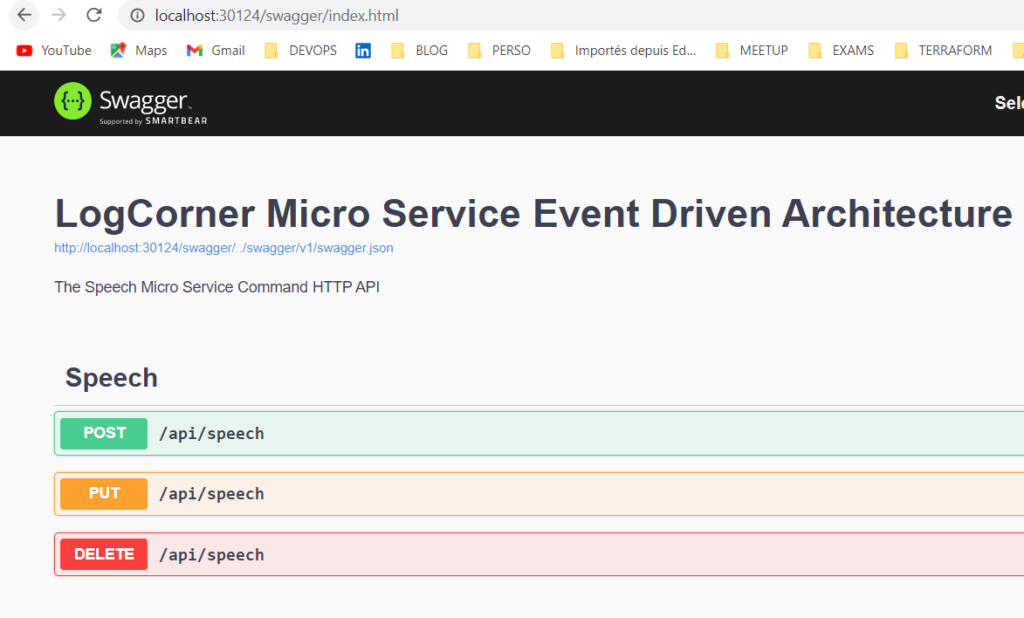
Create a post request (/api/speech), the body of the post request should look like this :
http://localhost:30124/swagger/index.html
{
  "title": "this is a title",
  "description": "Lorem Ipsum is simply dummy text of the printing and typesetting industry. Lorem Ipsum has been the industry's standard dummy text ever since the 1500s, when an unknown printer took a galley of type and scrambled it to make a type specimen book.",
  "url": "http://test.com",
  "typeId": 1
}
We should have a new record in the database

Code source is available here :
Thanks for reading, if you have any feedback, feel free to post it

