Setup Selenium Web Browser Automation using Asp.net Core
There exist many kind of test: unit tests, integration tests , acceptance test, …, UI tests.
For this tutorial, we will be interested on UI tests, indeed this kind of test, allows us to validate the IHM by launching the browser, clicking on elements and verify the result.
So we can validate the behaviour of the application on many browsers : chrome, safari, firefox, internet explorer, etc…
We can also use a specific version of a browser : for sample IE9
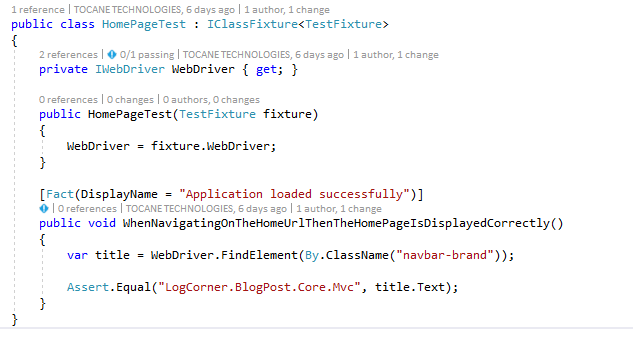
in this tutorial, we will not show how to write Selenium test in details but we will focus on browser automation in order to execution of UI tests on a build environnement.
So, Lets go ahead and create an asp.net core web project and a xUnit Test Project :
- install-package Selenium.WebDriver
- install-package Microsoft.AspNetCore.Hosting
- install-package Microsoft.AspNetCore.TestHost
- xunit
- xunit.runner.visualstudio
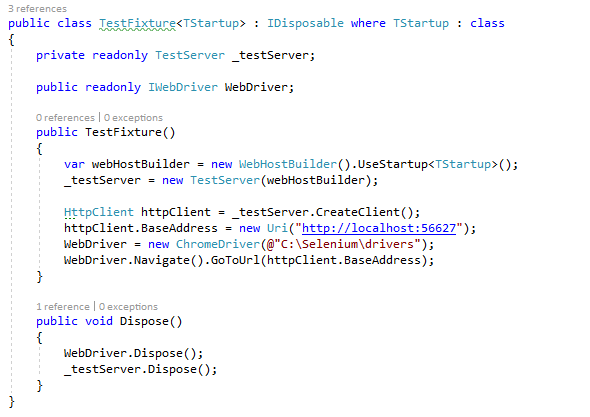
This implementation is suitable for api tesing without opening any browser, that’s mean http://localhost:56627 cannot work in the browser, because TestServer does not open any real network connections.
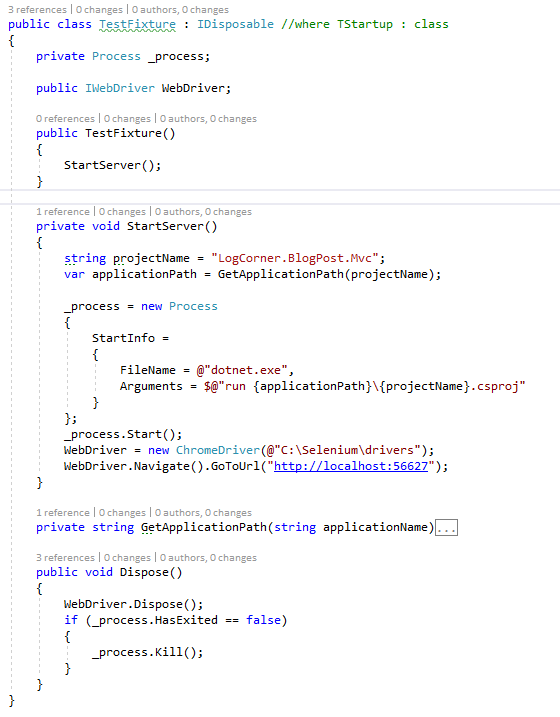
So for selenium testing I will update it using kestrel on NET Core command-line interface.
To host my project I locate the csproj folder and tell dotnet run :
dotnet run – -project C:\TEAMPROJECT\LogCorner.BlogPost.Core\LogCorner.BlogPost.Mvc\LogCorner.BlogPost.Mvc.csproj
I no longer need Startup class , so lets remove it
