DEPLOYING IN A PRIVATE AZURE ENVIRONMENT USING MANAGED DEVOPS POOLS
Deploying in a Private Azure Environment using Managed DevOps Pools
In your organization, you may have an Azure environment where all deployed services must be private due to security requirements.
In this context, it will not be possible to deploy from Azure DevOps or GitHub Actions using Microsoft-hosted DevOps agents, as these agents will not be able to enter a private environment.
For more information, please refer to the following link: Learn more about Azure DevOps Hosted Agents
Several solutions have been considered by DevOps teams to deploy in a private environment from GitHub Actions or Azure DevOps.
In my previous article, Azure DevOps Private Build Agent using Azure Container Instance and Terraform, I showed how to create private build agents using Docker, Azure Container Instance, and Terraform.
As a Microsoft MVP, I had the privilege of participating in a private preview of the Managed DevOps Pools, which will completely change the way to design private DevOps agents.
For more information on the topic of Managed DevOps Pools, please refer to the blog Announcing the Public Preview of Managed DevOps Pools (MDP) for Azure DevOps.
In this tutorial, I will show how to configure a Managed DevOps Pools (MDP) and deploy private infrastructure in Azure with Azure DevOps.
The architecture to be deployed is as follows:
A private function app (datasync-funcapp-dev) with a private endpoint enabled on an inboundSubnet (10.0.0.0/24) on the virtual network vnet-funcapp-dev (10.0.0.0/16) with a virtual network integration on an outboundSubnet (10.0.1.0/24) on the same virtual network vnet-funcapp-dev.
This function app datasync-funcapp-dev connects to a private storage account storagedatasyncdev with a private endpoint enabled on the subnet vnet-funcapp-dev/inboundSubnet.
In the second phase, I will use a Managed DevOps Pools (MDP) and Azure DevOps to deploy C# code into the function app (datasync-funcapp-dev).
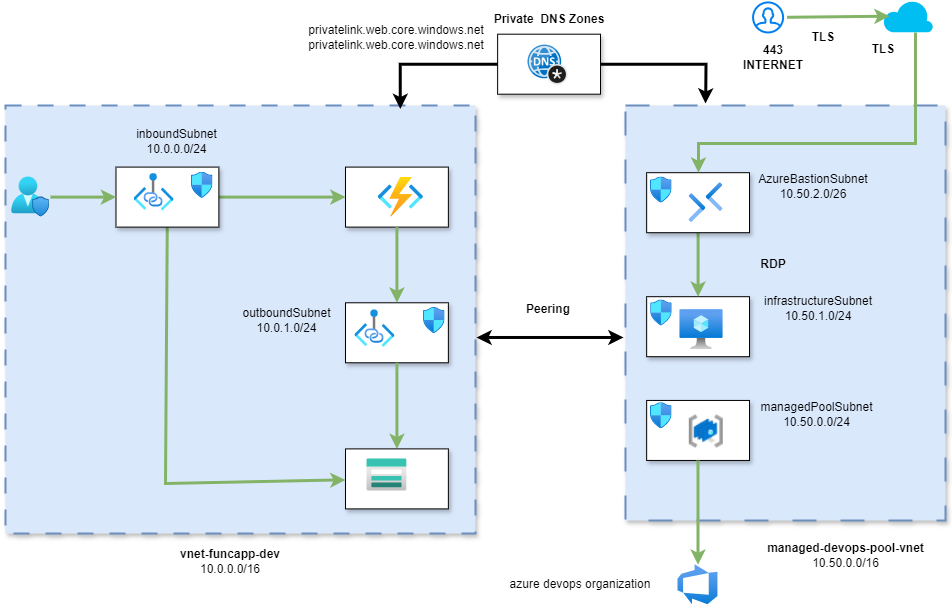
Figure A
A. Managed DevOps Pools Configuration
For more information on managed devops pools, please follow the link: https://learn.microsoft.com/en-us/azure/devops/managed-devops-pools/overview?view=azure-devops
In this section, I will configure a Managed DevOps Pool step-by-step:
- Register the Managed DevOps Pools resource provider
- Verify Azure DevOps permissions
- Create a Dev Center and a Dev Center Project
- Create the Managed DevOps Pools resource
- Configure the image
- Configure networking
- Ensure the pool is available in Azure DevOps
- Configure the build pipeline
- Complete the configuration
Steps:
-
- Connect your Azure DevOps organization to the same Microsoft Entra directory as your Azure subscription.
- Register the Managed DevOps Pools resource provider in your Azure subscription.
- Verify Azure DevOps permissions.
- Check Managed DevOps Pools quotas.
For more information on the prerequisites, please visit https://learn.microsoft.com/en-us/azure/devops/managed-devops-pools/prerequisites?view=azure-devops&tabs=azure-portal.
To register the Managed DevOps Pools resource provider in your Azure subscription, simply open your Azure portal and select your Azure subscription, under the settings tab, go to Resource Providers and activate Microsoft.DevOpsInfrastructure as shown in the following figure:Register the Managed DevOps Pools resource provider in your Azure subscription:
This step is part of the prerequisites before starting the configuration of a Managed DevOps Pool:
- Verify Azure DevOps permissions:
This step is also part of the prerequisites before starting the configuration of a Managed DevOps Pool: https://learn.microsoft.com/en-us/azure/devops/managed-devops-pools/prerequisites?view=azure-devops&tabs=azure-portal
- Connect your Azure DevOps organization to the same Microsoft Entra directory as your Azure subscription.
- Register the Managed DevOps Pools resource provider in your Azure subscription.
- Verify Azure DevOps permissions.
- Check Managed DevOps Pools quotas.
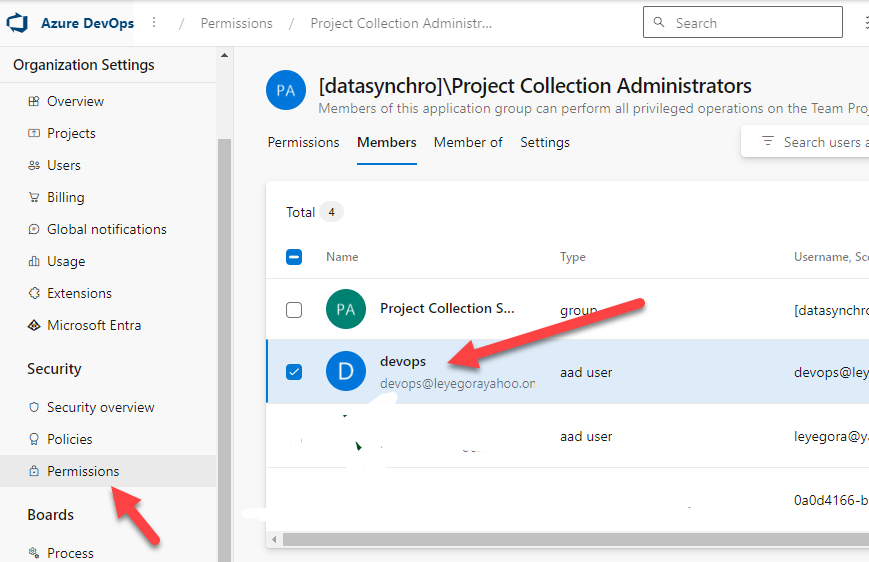
Indeed, when creating a Managed DevOps Pool, your identity is used to create an agent pool in your Azure DevOps organization.
To successfully create a Managed DevOps Pool, you must have one of the following permissions in your Azure DevOps organization.
These permissions are listed in ascending order of privileges.
- Organization-level agent pool administrator: Organization-level agent pool administrators can create new agent pools and perform all operations on them.
- Project collection administrator: The project collection administrators group is the main administrative security group defined for an organization and can perform all operations within an Azure DevOps organization, including creating new pools.
https://learn.microsoft.com/en-us/azure/devops/managed-devops-pools/prerequisites?view=azure-devops&tabs=azure-portal#verify-azure-devops-permissions
In fact, your identity is used to create an agent pool in your Azure DevOps organization. To successfully create a Managed DevOps Pool, I added my user to the permissions (Project collection administrator) in my Azure DevOps organization as shown in the following figure:
- Create a Dev Center and a Dev Center project:
Before creating a managed devops pool, you must first create a dev center and a dev center project.
For more information on the steps, please refer to the following link: https://learn.microsoft.com/en-us/azure/devops/managed-devops-pools/quickstart-azure-portal?view=azure-devops
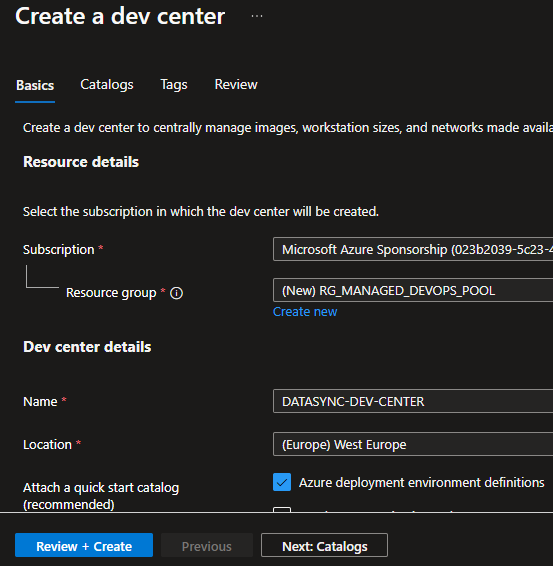
To create a dev center and a dev center project, I will create a resource group: ex RG_MANAGED_DEVOPS_POOL.
Then, in Azure portal, search for “Dev centers” and click on create as follows:
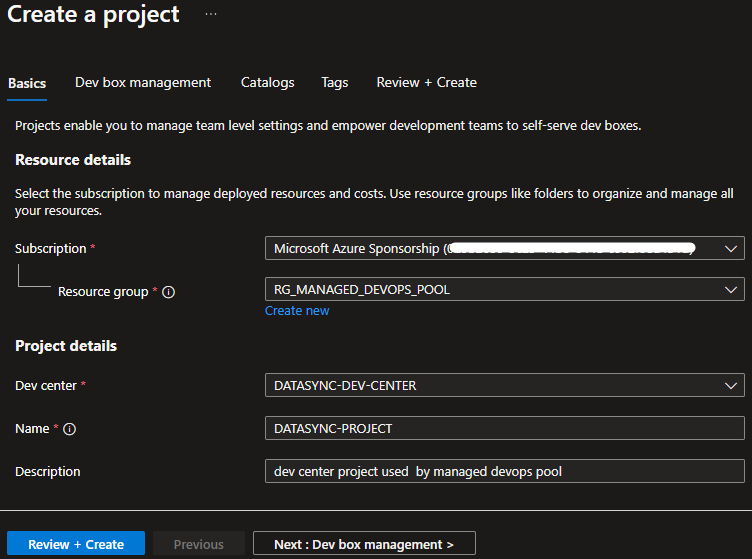
Wait for the deployment to complete, then, in the manage tab, click on project to create a new project.
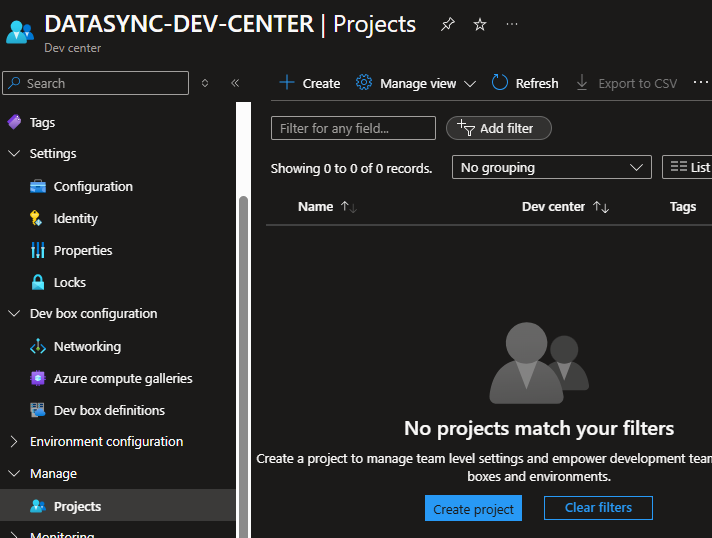
Provide the necessary information, resource group, name, description, and then click on review + create
- Create the Managed DevOps Pools resource:
Log in to the Azure portal.
Search for “Managed DevOps Pools” and click on “Create a Managed DevOps Pool.”
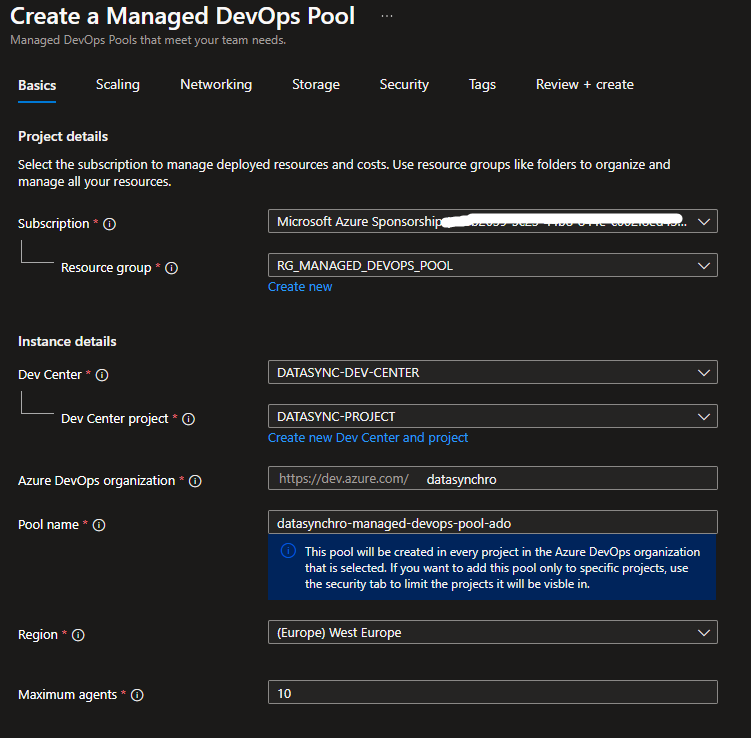
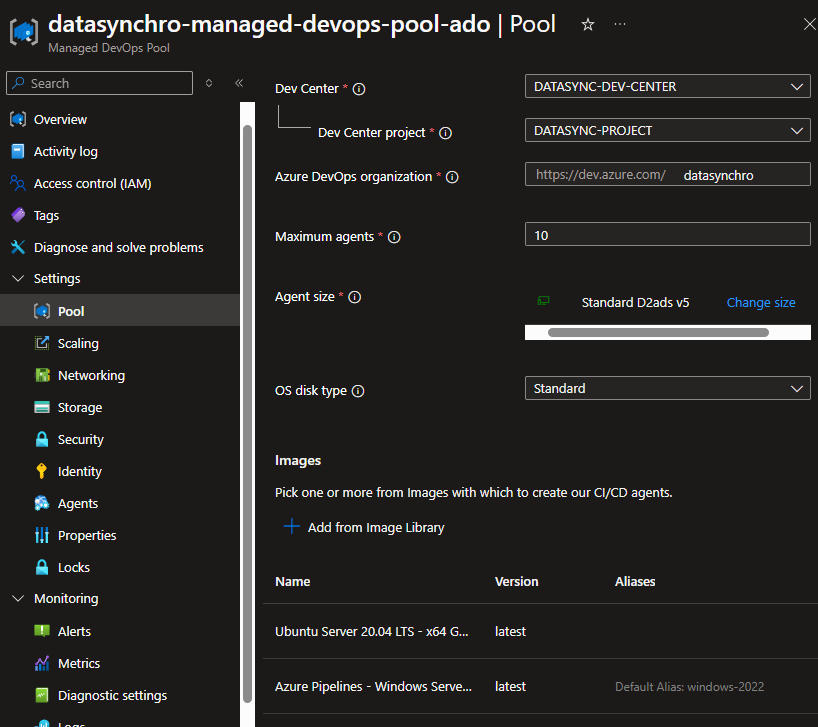
Fill in the necessary information:
- Resource group name
- Use the previously created Dev Center and Dev Center project
- In “Azure DevOps organization,” provide your DevOps organization (in my case, it’s https://dev.azure.com/datasynchro).
- Name your pool (datasynchro-managed-devops-pool-ado in my case).
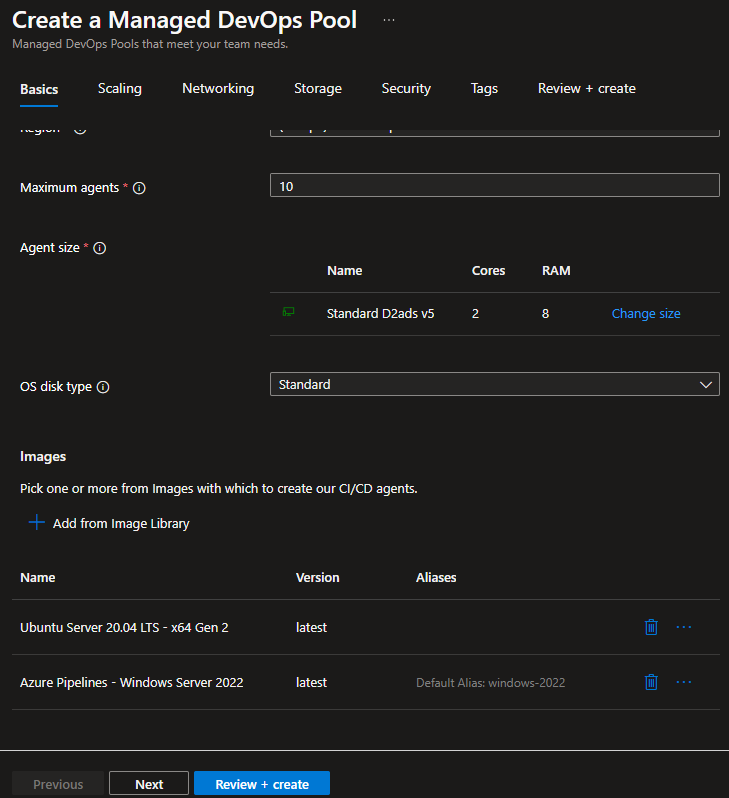
- For the rest, you can leave the default configuration or adjust it according to your requirements in terms of maximum agents, agent size, OS disk type, and images used by the agents.
Click “Next.” to continue
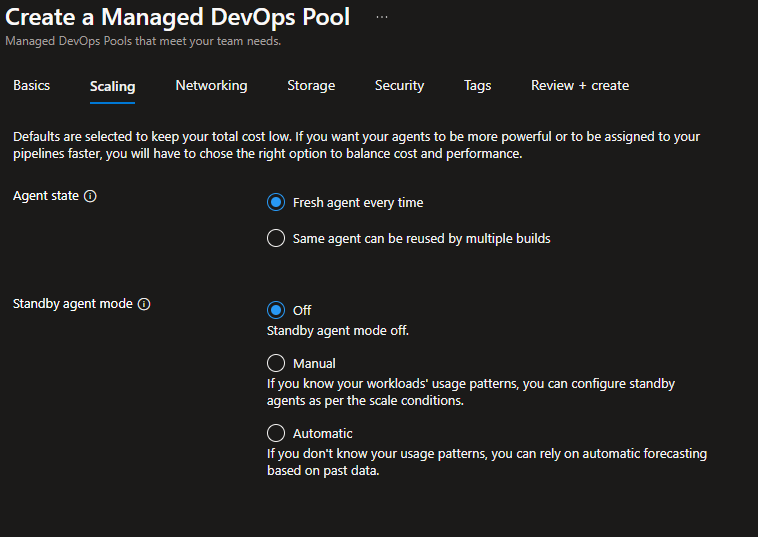
Review the default scaling configuration and click “Next.”
Customizing scaling will be covered in a separate topic.
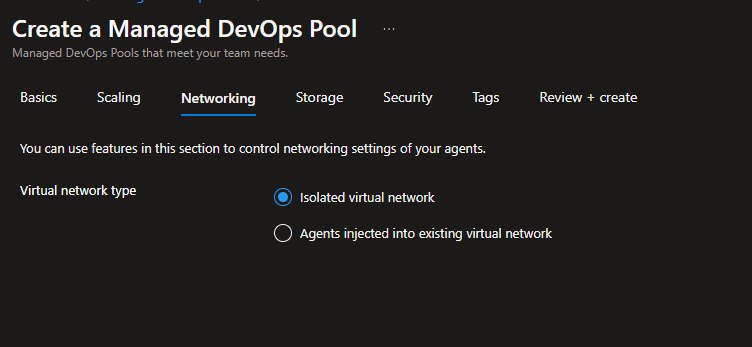
Review the default networking configuration and click “Next.”
Customizing networking will be covered in a separate topic.
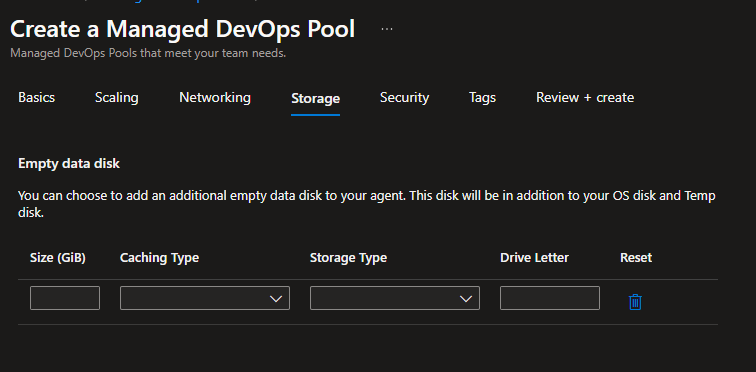
Review the default storage configuration and click “Next.”
Customizing storage will be covered in a separate topic.
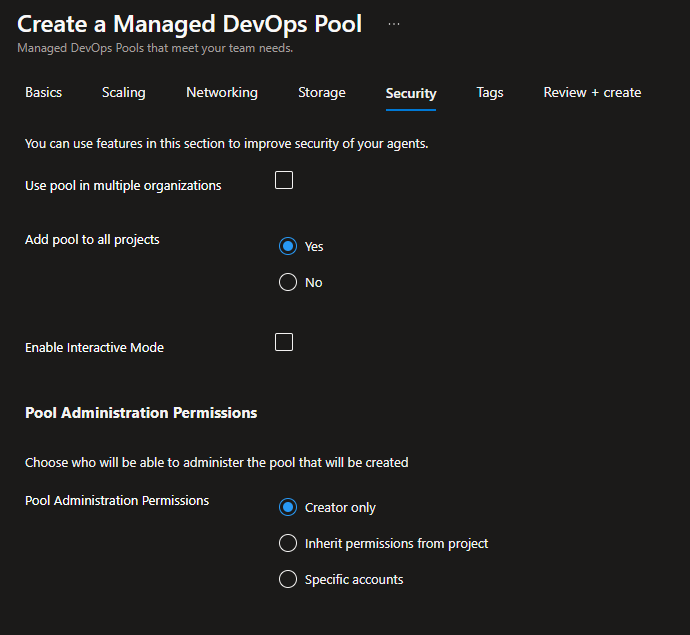
Review the default security configuration and click “Next.”
Customizing security will be covered in a separate topic.
Click “Review + Create” to complete the configuration of the Managed DevOps Pool resource.
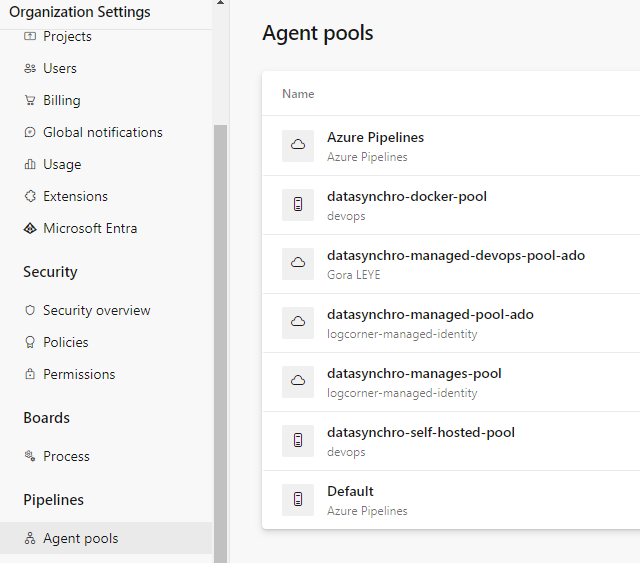
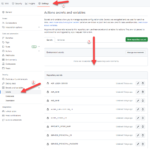
Wait until the deployment is completed, then check the pools in your organization: click on “Project Settings” then “Agent Pools.”
The previously configured pool should be displayed as shown in the following figure; if not, review your configuration.
- Configuring the Image:
Managed DevOps Pools offer several options for configuring the images that run on the virtual machines, allowing pipelines to execute in the pool.
You can create your pool with the following options:
- Use virtual machine images from Azure Marketplace.
- Use your own custom images from the Azure Compute Gallery.
- Use the same images as the Microsoft-hosted agents in Azure Pipelines.
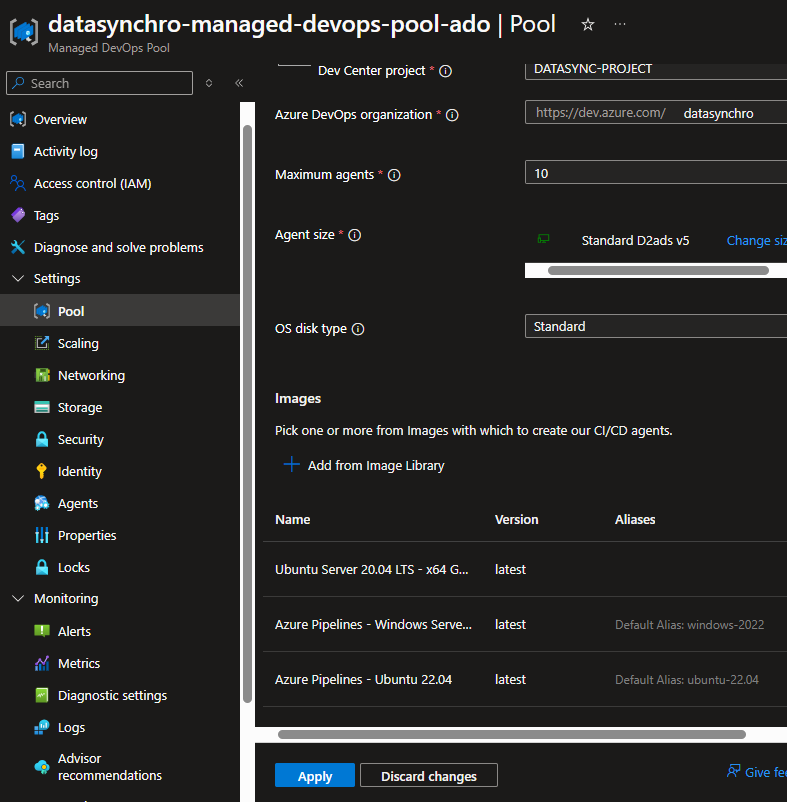
Managed DevOps Pools can be configured with a single image or multiple images (by specifying an alias).
For more information on configuring images, please refer to the following link: Configure images
I will use the 2 images Azure Pipelines Windows Server 2022 and Ubuntu 20.04 as they contain the necessary tools to configure our pipelines without needing to install additional tools:
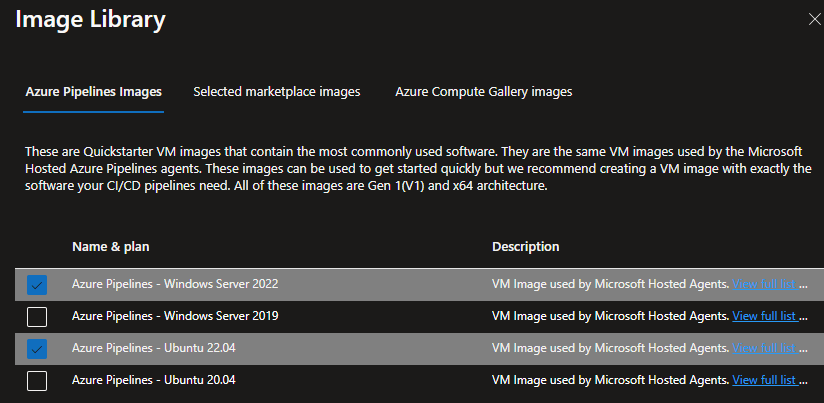
Click “Add” then “Apply.”
- Configuring the Build Pipeline:
My Managed DevOps Pool configuration is now ready and operational. In this section, I will create a pipeline in Azure DevOps using the Managed DevOps Pools.To do this, simply replace the default image (vmImage: ubuntu-latest) with your Managed DevOps Pool (name: datasynchro-managed-devops-pool-ado).# In the following configuration, replace vmImage: ubuntu-latest (where ubuntu-latest is the default image) with name: datasynchro-managed-devops-pool-ado (where datasynchro-managed-devops-pool-ado is the name of our Managed DevOps Pool) pool: vmImage: ubuntu-latest pool: name: datasynchro-managed-devops-pool-ado
B. Using the Managed DevOps Pool in a Private Network
In Part A, I completed the configuration of the Managed DevOps Pools, which is operational for deployments in an unrestricted network architecture.
Indeed, in the architecture setup (see Figure A), the function app and the storage account are private, so the default agents like ubuntu-latest or windows-latest will not be able to deploy code to the function app because the virtual machines behind cannot access the private network.
To resolve this issue, I will add the Managed DevOps Pools to a virtual network (internal network).
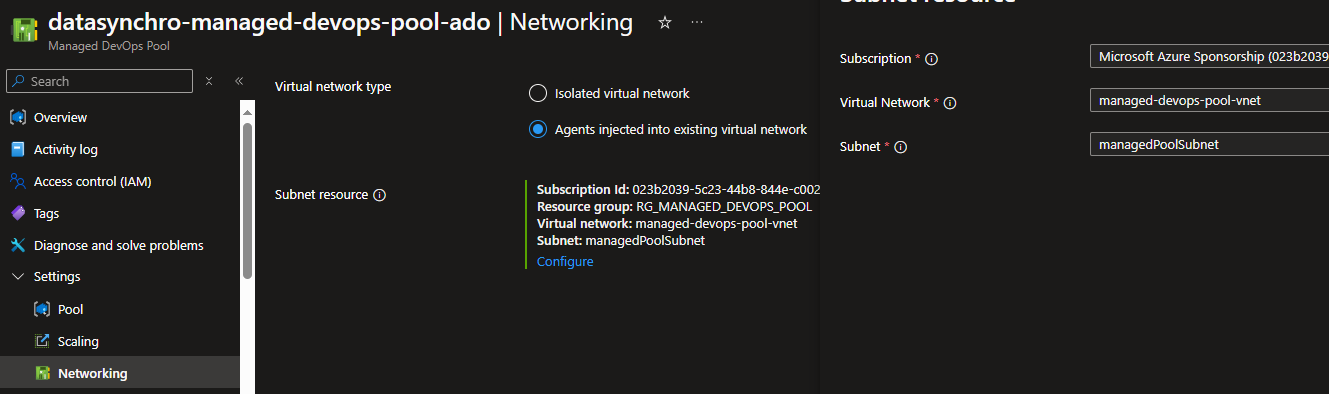
- Configuring Networking:
Open your Managed DevOps Pool under settings, select “Networking,” and then click on “Agents injected into existing virtual network.”
Click “Configure” and select our virtual network and subnet.
The subnet should be delegated to Microsoft.DevOpsInfrastructure/pools
- Completing the Configuration:
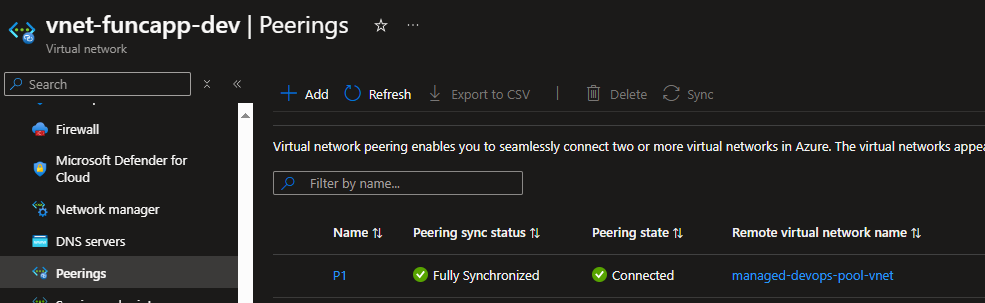
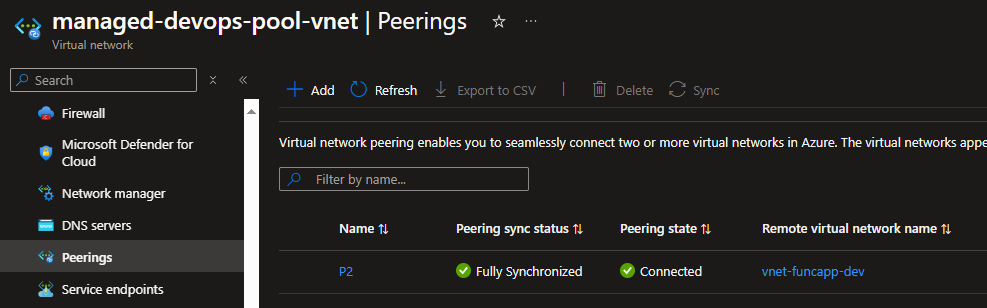
The Managed DevOps Pools is configured in a virtual network (managed-devops-pool-vnet) which is different from the virtual network where the function app is configured (vnet-funcapp-dev).
Therefore, I need to set up peering between the two virtual networks in both directions (virtual network managed-devops-pool-vnet <–> peering with virtual network vnet-funcapp-dev).
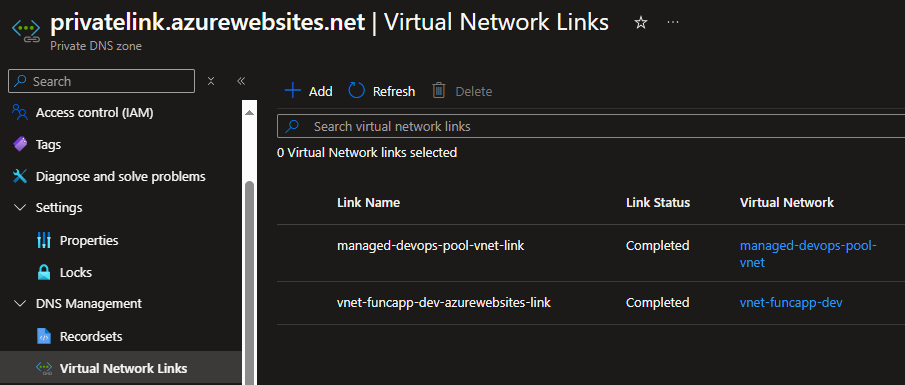
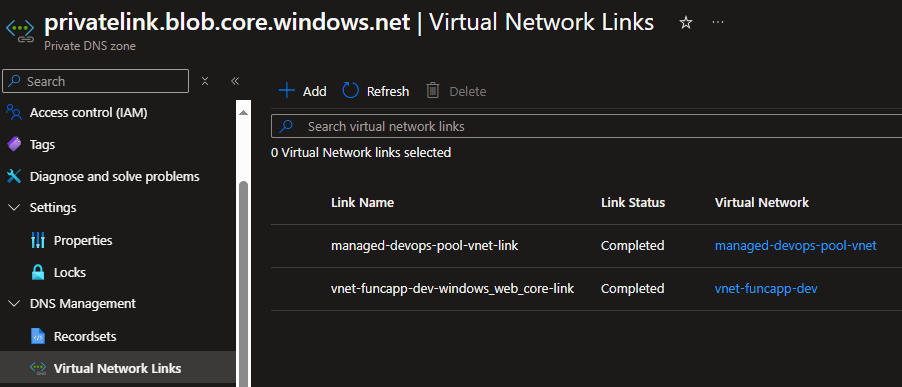
Finally, since my architecture uses private endpoints, I need to add a Virtual Network Link between the virtual networks (vnet-managed-devops-pool-vnet and vnet-funcapp-dev) and the private DNS zones (privatelink.blob.core.windows.net for the storage account and privatelink.azurewebsites.net for the function app).
B. Summary
I have completed the configuration of the Managed DevOps Pool and added it to a private network to enable deployments within the private architecture. With this new service now in public preview, Microsoft introduces a highly valuable feature in the DevOps world: setting up private DevOps agents.
In addition to this networking feature, other key features have been added. I encourage you to read the official blog for more information: Managed DevOps Pools.
C. Other blog posts in the same topic
- Introducing Azure DevOps Managed DevOps pools!
- A first look at using Azure Managed DevOps Pools
- Fixes for issues moving from on-premise Azure DevOps agents to Azure Managed DevOps Pool agents
- A first look at revolutionizing your cloud deployments with Azure Managed DevOps Pools
Github Repository
azurecorner/datasynchro-managed-pool-private-infra (github.com)
Related Posts
 Building micro services through Event Driven Architecture part25 : automate workflows to build, test, and deploy code from GitHub using GitHub Actions
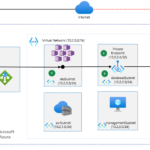 Building micro services through Event Driven Architecture part24 : deploy and manage applications on a Kubernetes cluster using helm charts
- Building micro services through Event Driven Architecture part23 : Azure Kubernetes Services
 Azure-Managed-Identities-Workload-Identity-Federation-Azure-Kubernetes-Services
 Building micro services through Event Driven Architecture part22 : Kubernetes
 Building micro services through Event Driven Architecture part21 : Monitoring and Observability