Building micro services through Event Driven Architecture part17 : Securing Command HTTP API using Azure Active Directory B2C
Building microservices through Event Driven Architecture part16 : Azure Active Directory B2C
This tutorial is the 17th part of a series : Building microservices through Event Driven Architecture.
The previous step is about Building micro services through Event Driven Architecture part16 : Azure Active Directory B2C
In this tutorial, I will show how to use an identity provider to secure the command http api microservice by enabling Oauth2 and OpenId Connect using Azure AD B2C.
Azure Active Directory B2C provides business-to-customer identity as a service. Your customers use their preferred social, enterprise, or local account identities to get single sign-on access to your applications and APIs.
Learn more about Azure AD B2C in What is Azure Active Directory B2C?
Azure Active Directory B2C
To setup Azure AD B2C as an identity provider , I need to create a B2C tenant wich is different from a Azure AD tenant
Azure AD B2C is a separate service from Azure Active Directory (Azure AD). It is built on the same technology as Azure AD but for a different purpose – to allow businesses build customer facing application and then allow anyone to sign up into those applications with no restrictions on user account.
Learn more about Azure AD in What is Azure Active Directory?
Securing Command HTTP API
To protect the command HTTP API microservice, I need to register an application in the azure AD B2C tenant, expose the API, define scopes , configure the web api to use Azure AD authentication and finally enable SwaggerSecurityDefinition
Azure AD B2C Application Registration
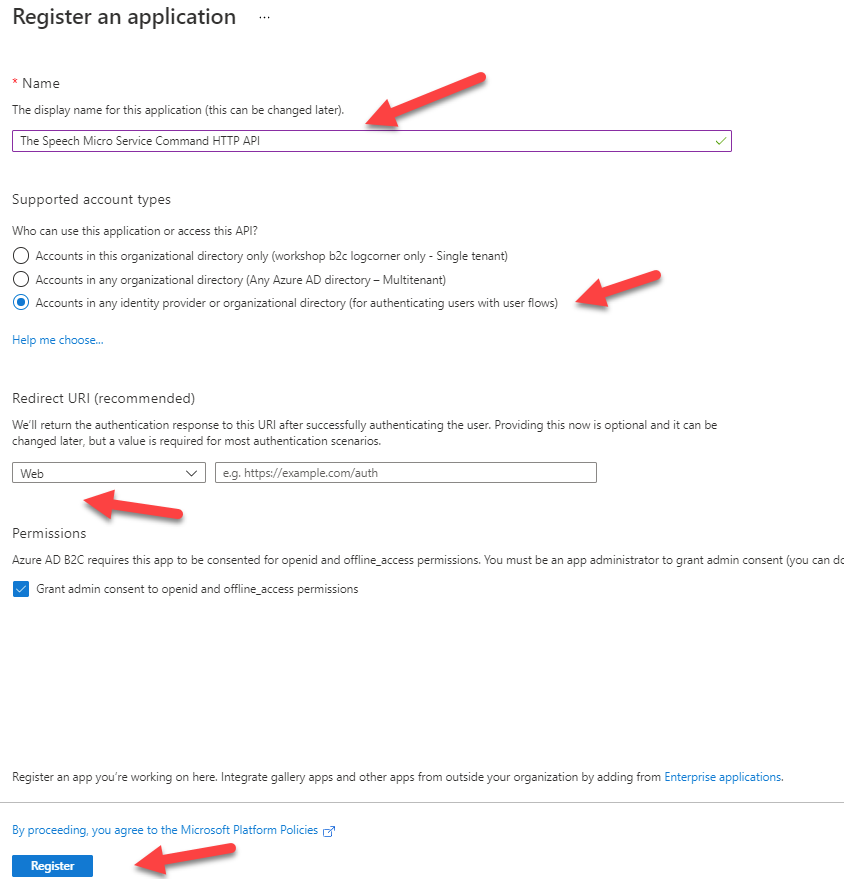
Go to the tenant and click app registration and fill in the form accordingly : provide an application name, the supported account types. Here I do not need a redirect URI because it is a web api.
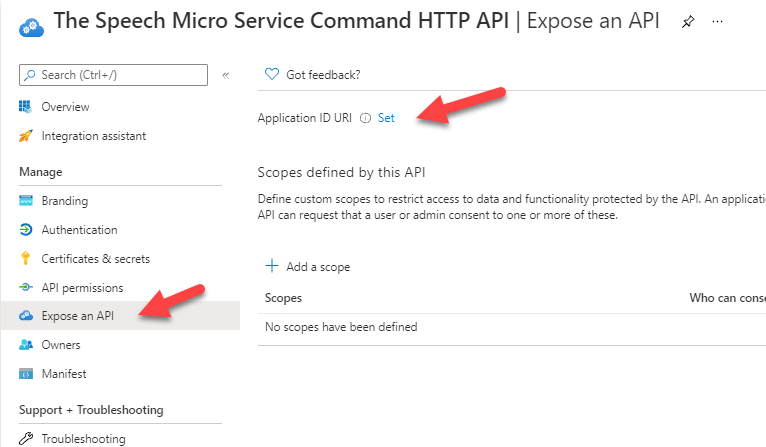
Click on Expose an api and set the application ID URI (in my case https://workshopb2clogcorner.onmicrosoft.com/command/api)
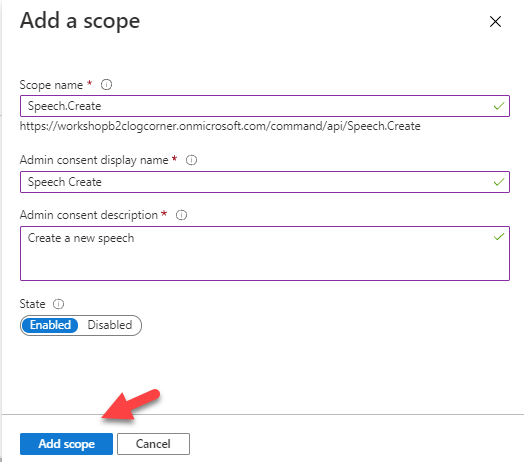
Add the API scope Speech.Create to enable users to grant consent. users should consent these scope to be allowed to create a new speech.
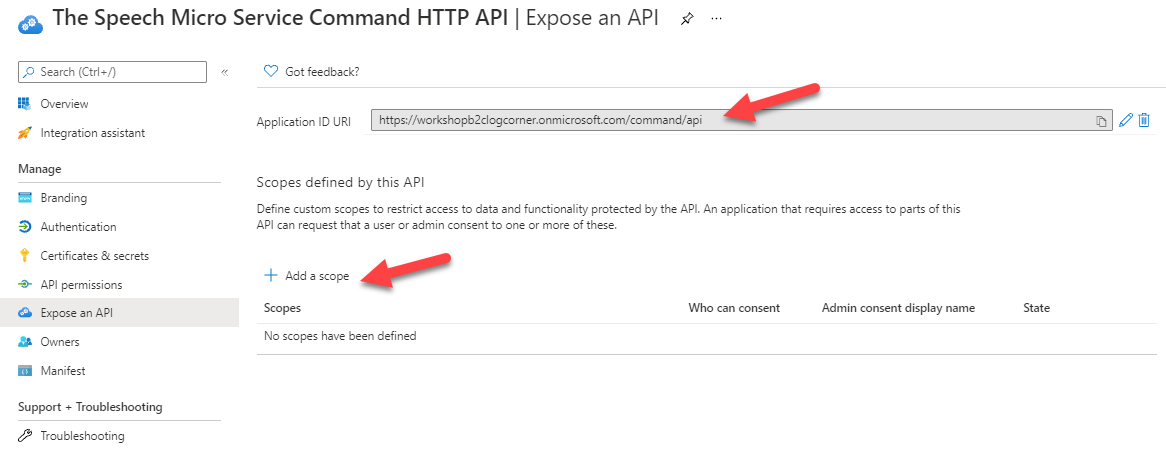
So click on Add a scope and provide the scope name , display name and description
Add the API scope Speech.Edit to enable users to grant consent. users should consent this scope to be allowed to update an existing speech.
So click on Add a scope and provide the scope name , display name and description

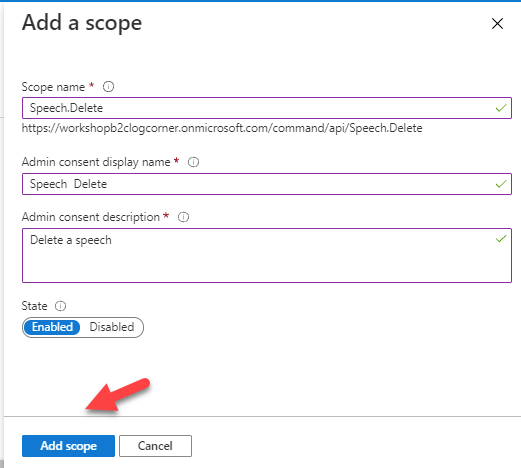
Add the API scope Speech.Deleteto enable users to grant consent. users should consent this scope to be allowed to delete an existing speech.
So click on Add a scope and provide the scope name , display name and description
Configure Command HTTP API
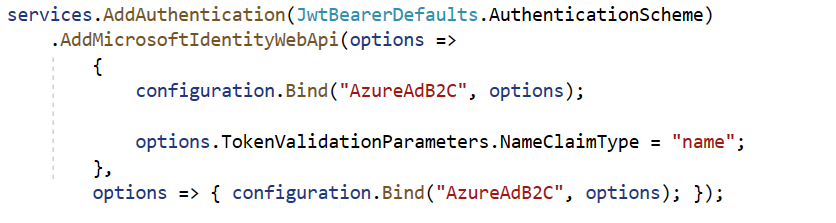
Open the startup.cs class and add the following
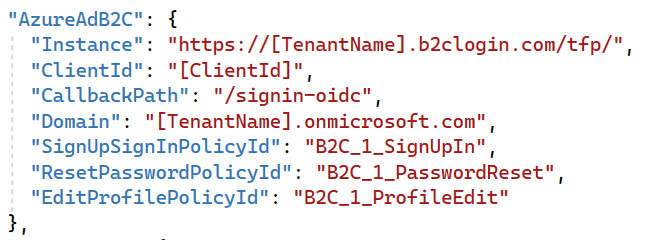
Open appsettings.Development.json and add the folllowing
Replace [ClientID] with the identifier of the application you registerd ealier and [TenantName] with the name of your tenant in my case workshopb2clogcorner
OpenAPI Specification : Enable Swagger
To test , document and use the api in real life , I’m going to use the open api swagger specification. for more information about swagger, I siggest you to follow this link https://swagger.io/resources/open-api/.
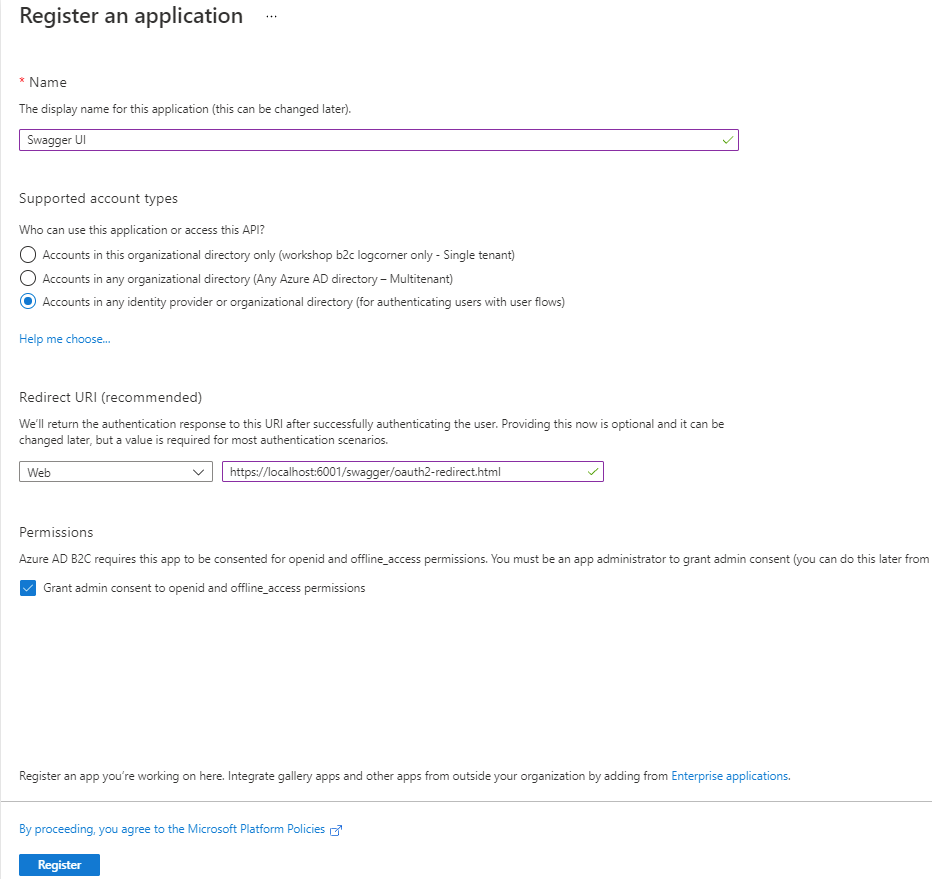
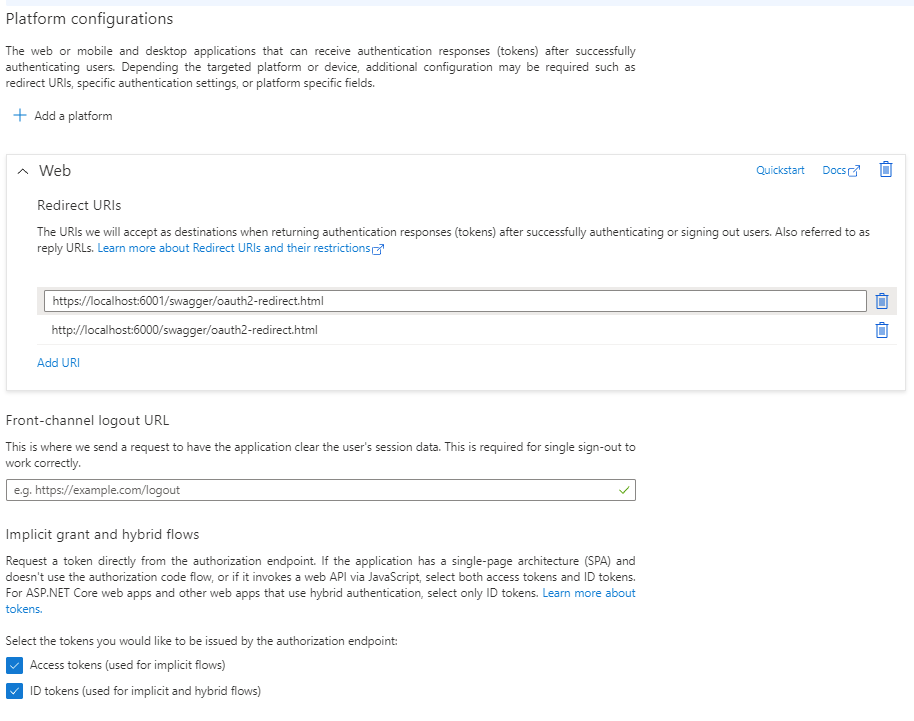
I have first to register the swagger web appliction in azure ad B2C tenant. just open your azure AD tenant , click on app registration as you did in the previous step : provide a name, the account types and the redirect uri should be http://localhost:6000/swagger/oauth2-redirect.html where http://localhost:6000 is the host of the web api.
Because after the authentication process , you should be redirected back to the swagger UI.
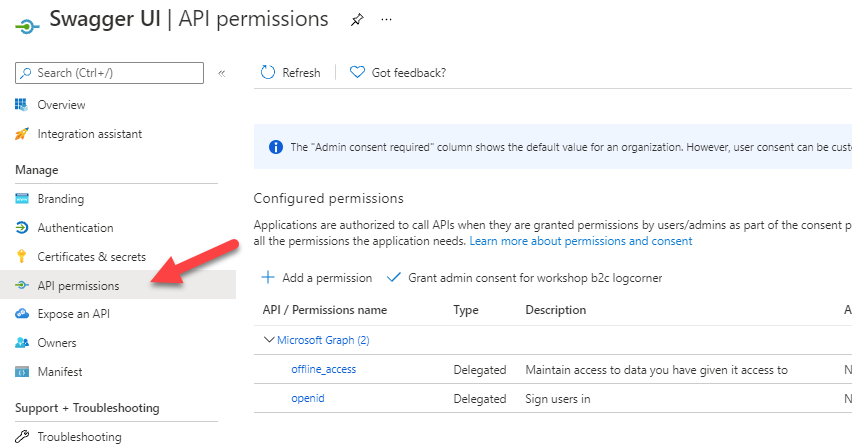
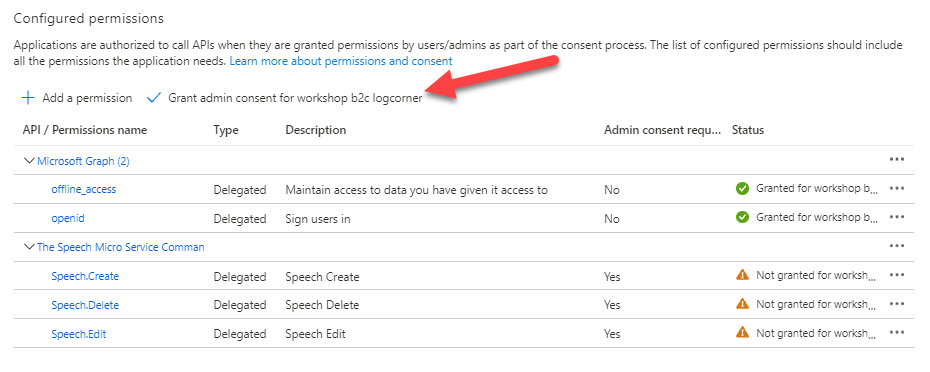
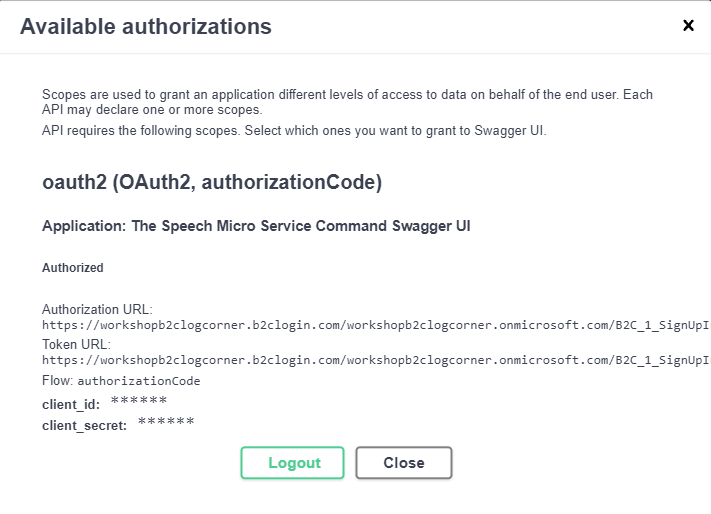
To authorize the swagger UI to call the web api, I should grant the admin consent for the tenant.
So open the swagger UI app registration and click on API Permissions
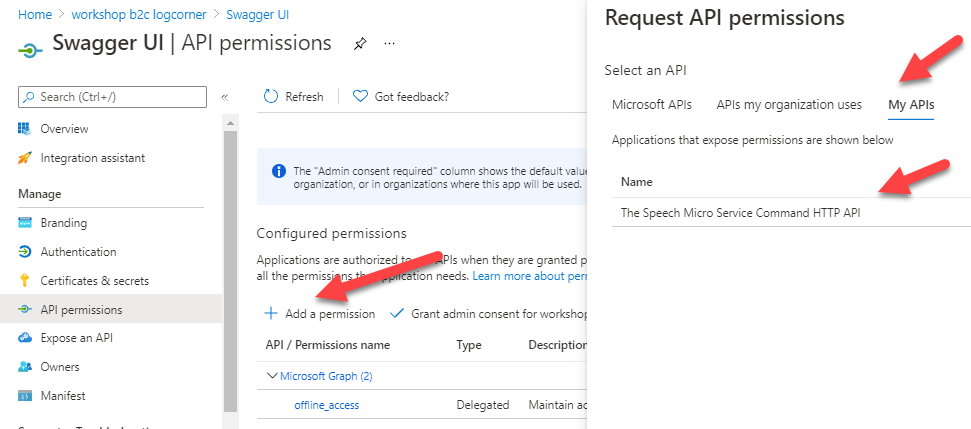
Click on Add a permission button and select My APis and choose the web API you registered earlier.
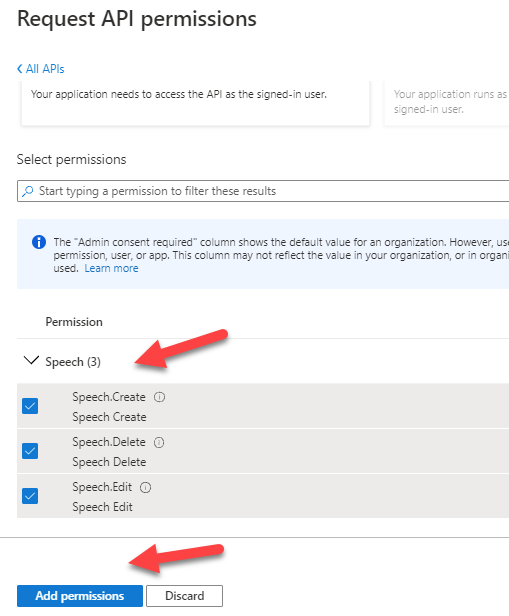
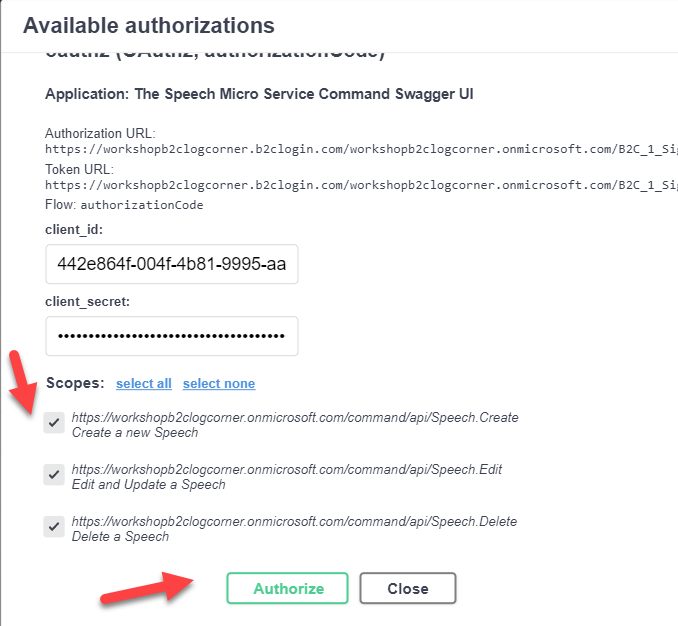
Select all the scopes and click on Add Permissions
Finally click on click grant admin consent for {your tenant}
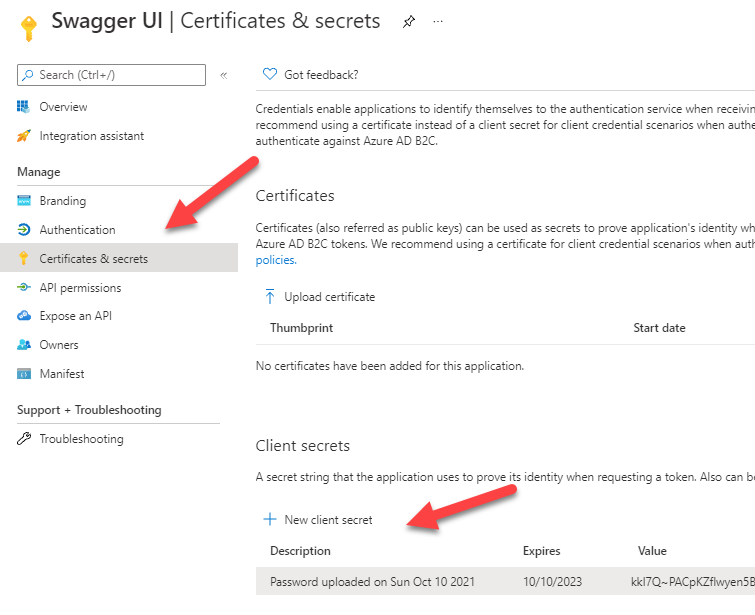
Click on Certificates & secrets and create a new client secret. you should keep it for use later because you cannot see it again.
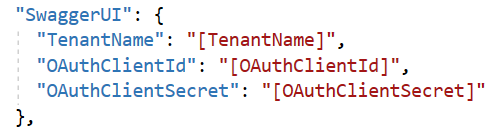
Open appsettings.Development.json file add the swaggerUI section where :
[TenantName] is the name of your B2C tenant
[OAuthClientId] is the swaggerUI application identifier you registered.
[OAuthClientSecret] is the client secret you created
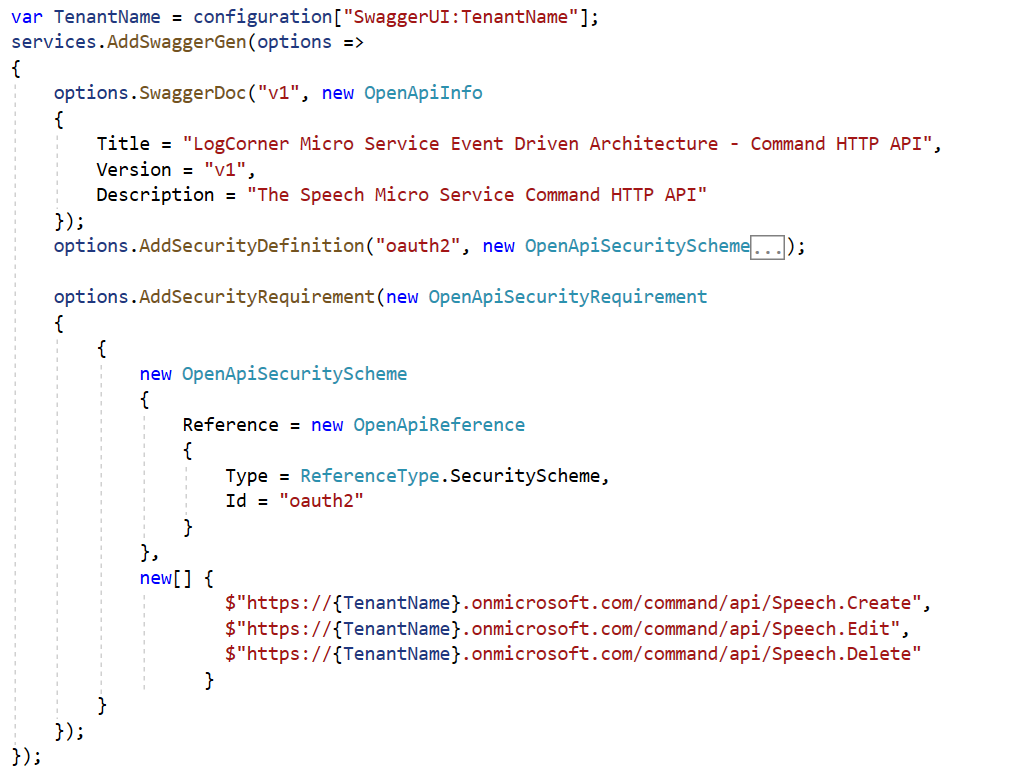
Open startup.cs class and the following code
options.AddSecurityDefinition
Add a securityDefinition to describe how your API is protected to the generated Swagger
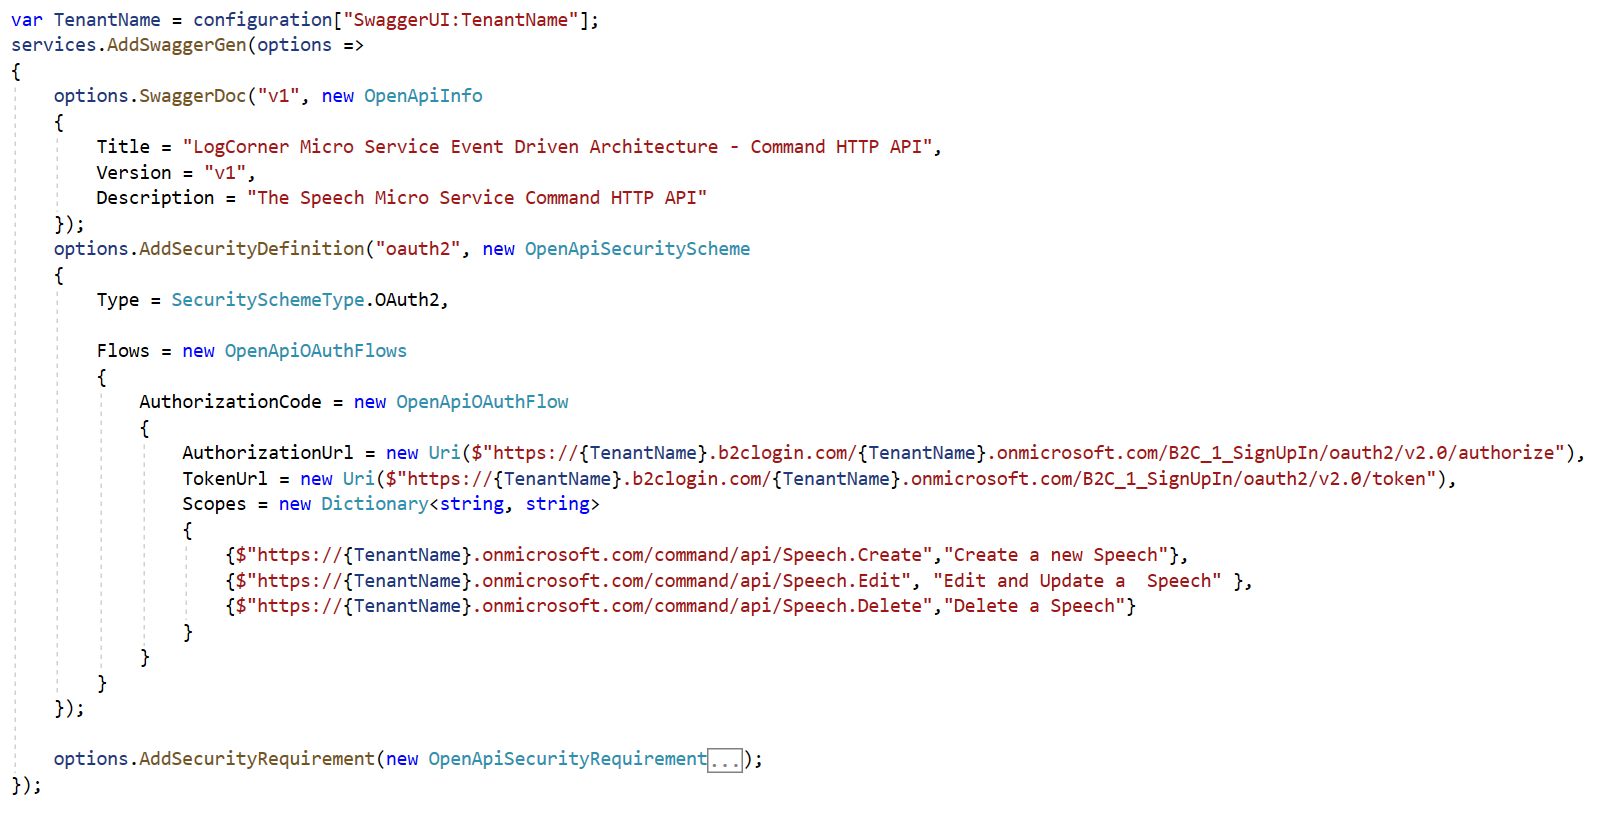
options.AddSecurityRequirement
Add a global security requirement. here you should add the list of scopes and OpenApiReference to oauth2.
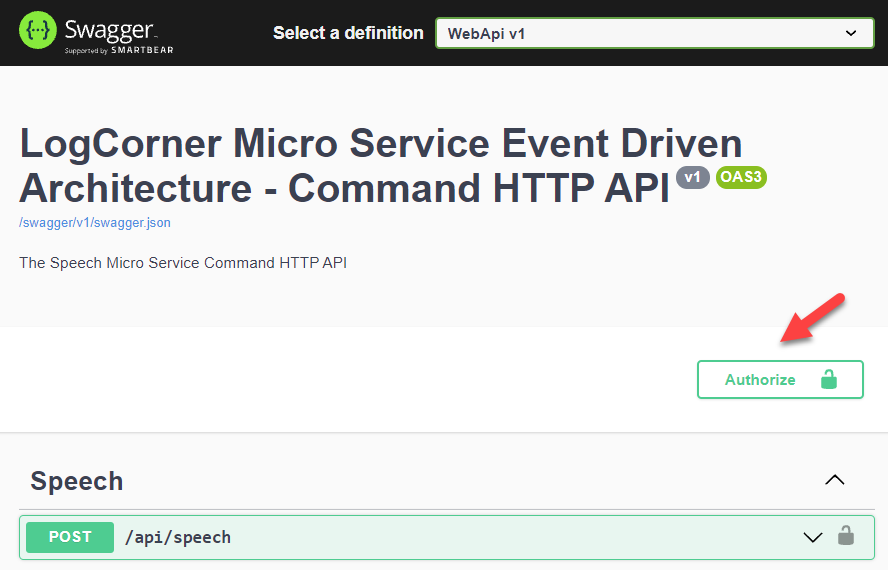
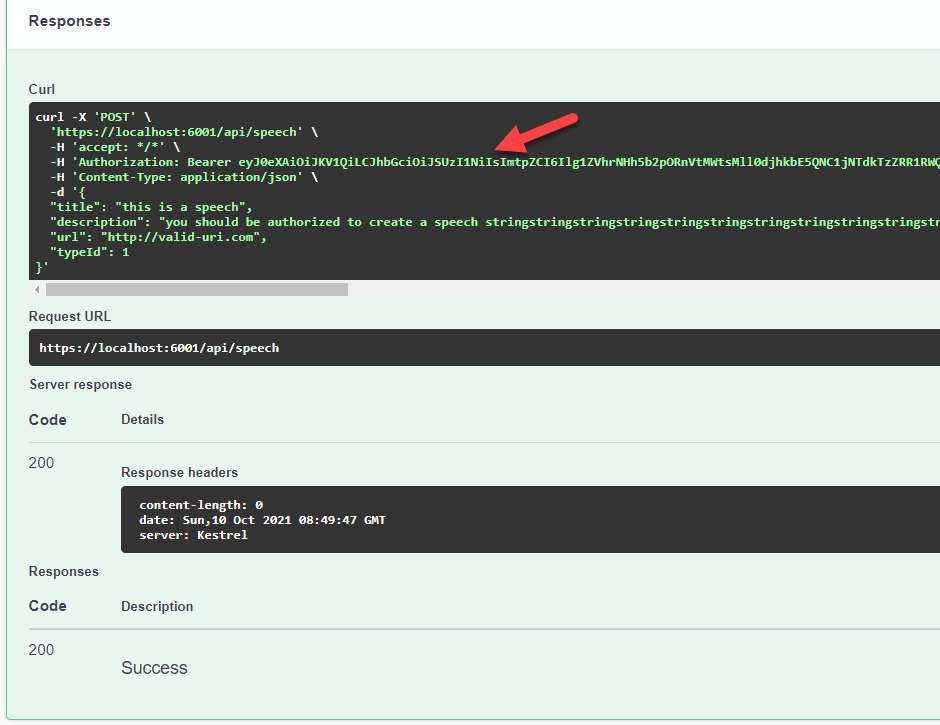
Testing
Code source is available here :
Thanks for reading, if you have any feedback, feel free to post it
Regards
Related Posts
 Building micro services through Event Driven Architecture part25 : automate workflows to build, test, and deploy code from GitHub using GitHub Actions
 Building micro services through Event Driven Architecture part24 : deploy and manage applications on a Kubernetes cluster using helm charts
- Building micro services through Event Driven Architecture part23 : Azure Kubernetes Services
 Azure-Managed-Identities-Workload-Identity-Federation-Azure-Kubernetes-Services
 Building micro services through Event Driven Architecture part22 : Kubernetes
 Building micro services through Event Driven Architecture part21 : Monitoring and Observability