How to Customize Asp.NET Identity with External Database Storage step by step
ASP.NET Identity is designed to enable us to easily use a number of different storage providers for our ASP.NET applications. We can use the supplied Identity providers that are included with the .NET Framework, or we can implement your own providers.
There are two primary reasons for creating a custom Identity provider.
We need to store Identity information in a data source that is not supported by the Identity providers included with the .NET Framework, such as a MysQL database, an Oracle database, or other data sources.
We need to manage Identity information using a database schema that is different from the database schema used by the providers that ship with the .NET Framework.
A common example of this would be to use authentication data that already exists in a SQL Server database for a company or Web site.
In this tutorial, we are going to implement and configure a custom Identity Provider using ASP.NET MVC5
Create Asp.NET MVC Project
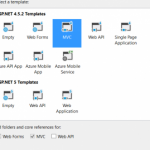
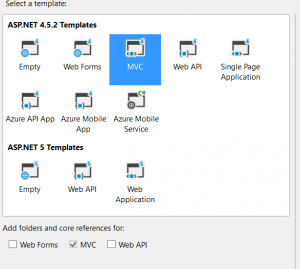
Open Visual Studio and create an ASP.NET Web application project and choose MVC template
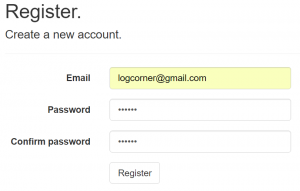
Lets press F5 to run our projet and click on << Register >> link so as to create a new account as follow

Lets enter our email and our password and click register button
Open app_data folder in solution explorer and open containing folder
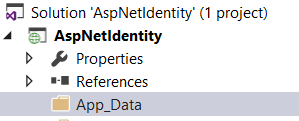

We will see that a database is created at runtime and named aspnet-AspNetIdentity-20160402093629, asp.net will use that database to store security informations like user, passwords, roles, etc…
Note that aspnet-AspNetIdentity-2016040209362 is not created on Database Server but as attached file. So, we will move database on SQL Server and use it to customize Asp.Net identity.
Lets use visual Studio and click View, then SQL Server Object Explorer, select database and expand tables
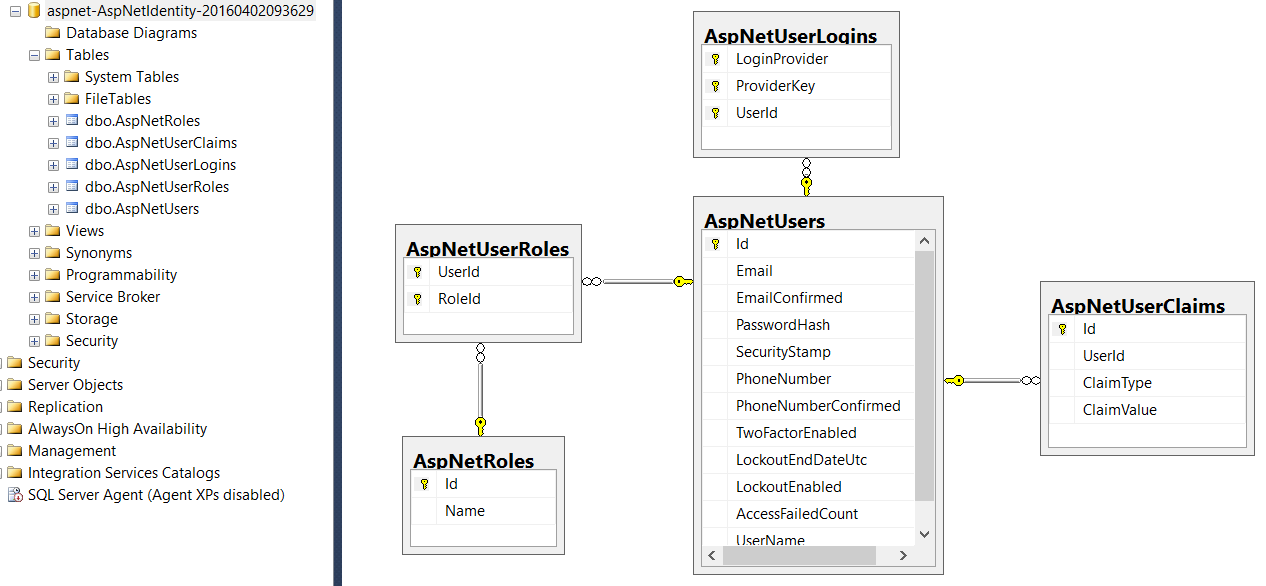
5 tables has been created : AspNetRoles, AspNetUserClaims, AspNetUserLogins, AspNetUserRoles, AspNetUsers

And the registered user has been inserted on AspNetUsers table

Our Identity Storage is now ready, we will come back later to data structure
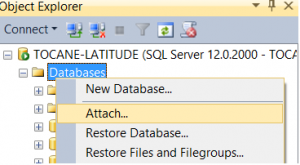
Now , open SQL Server Express and attach the identity Database created earlier
Right click databases and click attach , browse and choose the database so as to store aspnet-AspNetIdentity-20160402093629 in SQL Server
We can explore our DataBase Model by creating a database diagram as follow
Finally, open web.config file and change connectionstrings to target Sql Server Database as follow

Lets press F5 and run our application to register and login a new user
Our application is now ready to use an external storage, on the next section, we will show you how to customize the external database storage
Create Identity Library Project
Lets create a Class Library project and name it IdentityLibrary
Right click reference and select Manage Nuget Packages

Install package Microsoft.AspNet.Identity.Core and Microsoft.AspNet.Identity.EntityFramework
Create an IdentityUser class to hold user informations, it inherits from IdentityUser
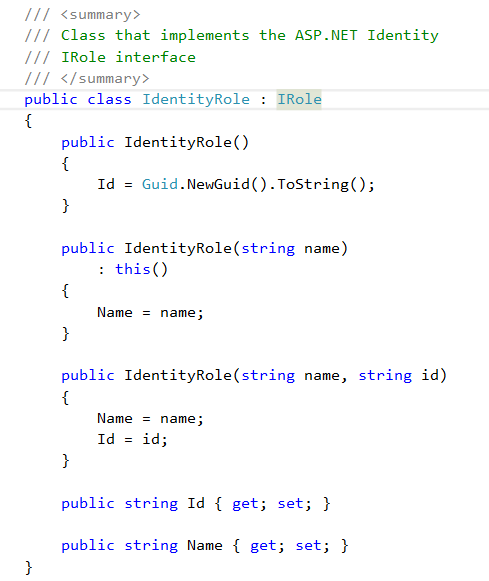
Create a IdentityRole class to hold user roles informations
Lets create a UserStore class, Asp.NET MVC use it by default
var manager = new ApplicationUserManager(new UserStore<ApplicationUser>(context.Get<ApplicationDbContext>()));
But we will implement it to customize our storage provider

Lets Create a RoleStore Class and implement IRoleIdentity
Create an Entity Framework dataModel
Right click IdentityLibrary project and add a new item , select ADO.NET Entity Data Model and click Add

Select Code First From Database and click next

If we have already a dataconnection, we can choose it or create a new connection, select Microsoft SQL Server and clic Continue

Select Server Name, use Windows Authentication or SQL Server Authentication ( with credentials) , then select database and then click OK

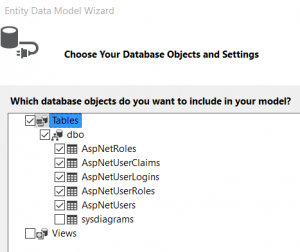
Check database tables and generate our model
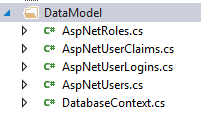
So, 5 classes are created in IdentityLibrary project and mapped to database tables, we will these classes to manage object
Configure Asp.Net client to target our custom Identity Library

Press F5 to run application, and register a new account

We will see that, our new framwork
Implement custom identity
- Implement UserStore
/// <summary>
/// Class that implements the key ASP.NET Identity user store iterfaces
/// </summary>
public class UserStore<T> : IUserRoleStore<T>,
IUserStore<T>,
IUserPasswordStore<T>,
IUserEmailStore<T>,
IUserLockoutStore<T, string>,
IUserTwoFactorStore<T, string>
where T : IdentityUser
{
private readonly UserRepository<T> _userTable;
private readonly UserRolesRepository _userRolesTable;public UserStore(DatabaseContext databaseContext)
{
_userTable = new UserRepository<T>(databaseContext);
_userRolesTable = new UserRolesRepository(databaseContext);
}public Task CreateAsync(T user)
{
if (user == null)
{
throw new ArgumentNullException(“user”);
}
return Task.Run(() => _userTable.Insert(user));
}public Task<T> FindByIdAsync(string userId)
{
if (string.IsNullOrEmpty(userId))
{
throw new ArgumentException(“Null or empty argument: userId”);
}return Task.Run(() => _userTable.GeTById(userId));
}public Task<bool> GetTwoFactorEnabledAsync(T user)
{
return Task.FromResult(user.TwoFactorEnabled);
}public Task<T> FindByNameAsync(string userName)
{
if (string.IsNullOrEmpty(userName))
{
throw new ArgumentException(“Null or empty argument: userName”);
}return Task.Run(() => _userTable.GeTByName(userName));
}public Task<IList<string>> GetRolesAsync(T user)
{
if (user == null)
{
throw new ArgumentNullException(“user”);
}return Task.Run(() => _userRolesTable.FindByUserId(user.Id));
}public Task<string> GetPasswordHashAsync(T user)
{
return Task.Run(() => _userTable.GetPasswordHash(user.Id));
}public Task SetPasswordHashAsync(T user, string passwordHash)
{
return Task.Run(() => user.PasswordHash = passwordHash);
}public Task<T> FindByEmailAsync(string email)
{
if (String.IsNullOrEmpty(email))
{
throw new ArgumentNullException(“email”);
}return Task.Run(() => _userTable.GeTByEmail(email));
}public Task<string> GetEmailAsync(T user)
{
return Task.FromResult(user.Email);
}public Task<int> GetAccessFailedCountAsync(T user)
{
return Task.FromResult(user.AccessFailedCount);
}public Task<bool> GetLockoutEnabledAsync(T user)
{
return Task.FromResult(user.LockoutEnabled);
}public Task<DateTimeOffset> GetLockoutEndDateAsync(T user)
{
return
Task.FromResult(user.LockoutEndDateUtc.HasValue
? new DateTimeOffset(DateTime.SpecifyKind(user.LockoutEndDateUtc.Value, DateTimeKind.Utc))
: new DateTimeOffset());
}public Task SetLockoutEnabledAsync(T user, bool enabled)
{
user.LockoutEnabled = enabled;return Task.Run(() => _userTable.Update(user));
}public Task SetLockoutEndDateAsync(T user, DateTimeOffset lockoutEnd)
{
throw new NotImplementedException();
}public Task SetTwoFactorEnabledAsync(T user, bool enabled)
{
throw new NotImplementedException();
}public Task DeleteAsync(T user)
{
throw new NotImplementedException();
}public Task<int> IncrementAccessFailedCountAsync(T user)
{
throw new NotImplementedException();
}public Task ResetAccessFailedCountAsync(T user)
{
throw new NotImplementedException();
}public Task<bool> GetEmailConfirmedAsync(T user)
{
throw new NotImplementedException();
}public Task SetEmailAsync(T user, string email)
{
throw new NotImplementedException();
}public Task SetEmailConfirmedAsync(T user, bool confirmed)
{
throw new NotImplementedException();
}public Task<bool> IsInRoleAsync(T user, string roleName)
{
throw new NotImplementedException();
}public Task RemoveFromRoleAsync(T user, string roleName)
{
throw new NotImplementedException();
}public Task<bool> HasPasswordAsync(T user)
{
throw new NotImplementedException();
}public Task UpdateAsync(T user)
{
throw new NotImplementedException();
}public Task AddToRoleAsync(T user, string roleName)
{
throw new NotImplementedException();
}public void Dispose()
{
//throw new NotImplementedException();
}
}
- Create a class UserRepository and implement it
public class UserRepository<T> where T : IdentityUser
{
private readonly DatabaseContext _databaseContext;public UserRepository(DatabaseContext databaseContext)
{
_databaseContext = databaseContext;
}internal T GeTByName(string userName)
{
var user = _databaseContext.AspNetUsers.SingleOrDefault(u => u.UserName == userName);
if (user != null)
{
T result = (T)Activator.CreateInstance(typeof(T));
result.Id = user.Id;
result.UserName = user.UserName;
result.PasswordHash = user.PasswordHash;
result.SecurityStamp = user.SecurityStamp;
result.Email = result.Email;
result.EmailConfirmed = user.EmailConfirmed;
result.PhoneNumber = user.PhoneNumber;
result.PhoneNumberConfirmed = user.PhoneNumberConfirmed;
result.LockoutEnabled = user.LockoutEnabled;
result.LockoutEndDateUtc = user.LockoutEndDateUtc;
result.AccessFailedCount = user.AccessFailedCount;
return result;
}
return null;
}internal T GeTByEmail(string email)
{
var user = _databaseContext.AspNetUsers.SingleOrDefault(u => u.Email == email);
if (user != null)
{
T result = (T)Activator.CreateInstance(typeof(T));result.Id = user.Id;
result.UserName = user.UserName;
result.PasswordHash = user.PasswordHash;
result.SecurityStamp = user.SecurityStamp;
result.Email = result.Email;
result.EmailConfirmed = user.EmailConfirmed;
result.PhoneNumber = user.PhoneNumber;
result.PhoneNumberConfirmed = user.PhoneNumberConfirmed;
result.LockoutEnabled = user.LockoutEnabled;
result.LockoutEndDateUtc = user.LockoutEndDateUtc;
result.AccessFailedCount = user.AccessFailedCount;
return result;
}
return null;
}internal int Insert(T user)
{
_databaseContext.AspNetUsers.Add(new AspNetUsers
{
Id = user.Id,
UserName = user.UserName,
PasswordHash = user.PasswordHash,
SecurityStamp = user.SecurityStamp,
Email = user.Email,
EmailConfirmed = user.EmailConfirmed,
PhoneNumber = user.PhoneNumber,
PhoneNumberConfirmed = user.PhoneNumberConfirmed,
LockoutEnabled = user.LockoutEnabled,
LockoutEndDateUtc = user.LockoutEndDateUtc,
AccessFailedCount = user.AccessFailedCount
});return _databaseContext.SaveChanges();
}/// <summary>
/// Returns an T given the user’s id
/// </summary>
/// <param name=”userId”>The user’s id</param>
/// <returns></returns>
public T GeTById(string userId)
{
var user = _databaseContext.AspNetUsers.Find(userId);
T result = (T)Activator.CreateInstance(typeof(T));result.Id = user.Id;
result.UserName = user.UserName;
result.PasswordHash = user.PasswordHash;
result.SecurityStamp = user.SecurityStamp;
result.Email = result.Email;
result.EmailConfirmed = user.EmailConfirmed;
result.PhoneNumber = user.PhoneNumber;
result.PhoneNumberConfirmed = user.PhoneNumberConfirmed;
result.LockoutEnabled = user.LockoutEnabled;
result.LockoutEndDateUtc = user.LockoutEndDateUtc;
result.AccessFailedCount = user.AccessFailedCount;
return result;
}/// <summary>
/// Return the user’s password hash
/// </summary>
/// <param name=”userId”>The user’s id</param>
/// <returns></returns>
public string GetPasswordHash(string userId)
{
var user = _databaseContext.AspNetUsers.FirstOrDefault(u => u.Id == userId);
var passHash = user != null ? user.PasswordHash : null;
return passHash;
}/// <summary>
/// Updates a user in the Users table
/// </summary>
/// <param name=”user”></param>
/// <returns></returns>
public int Update(T user)
{
var result = _databaseContext.AspNetUsers.FirstOrDefault(u => u.Id == user.Id);
if (result != null)
{
result.UserName = user.UserName;
result.PasswordHash = user.PasswordHash;
result.SecurityStamp = user.SecurityStamp;
result.Email = result.Email;
result.EmailConfirmed = user.EmailConfirmed;
result.PhoneNumber = user.PhoneNumber;
result.PhoneNumberConfirmed = user.PhoneNumberConfirmed;
result.LockoutEnabled = user.LockoutEnabled;
result.LockoutEndDateUtc = user.LockoutEndDateUtc;
result.AccessFailedCount = user.AccessFailedCount;
return _databaseContext.SaveChanges();
}
return 0;
}
}
- Create a UserRolesRepository class and implement it
Our asp.net client application is now ready to use IdentityLibrary to register, and it enable us to login and logout user
In our next tutorial, we will talk about how to manage roles using Asp.NET indentity.
Best regards.


